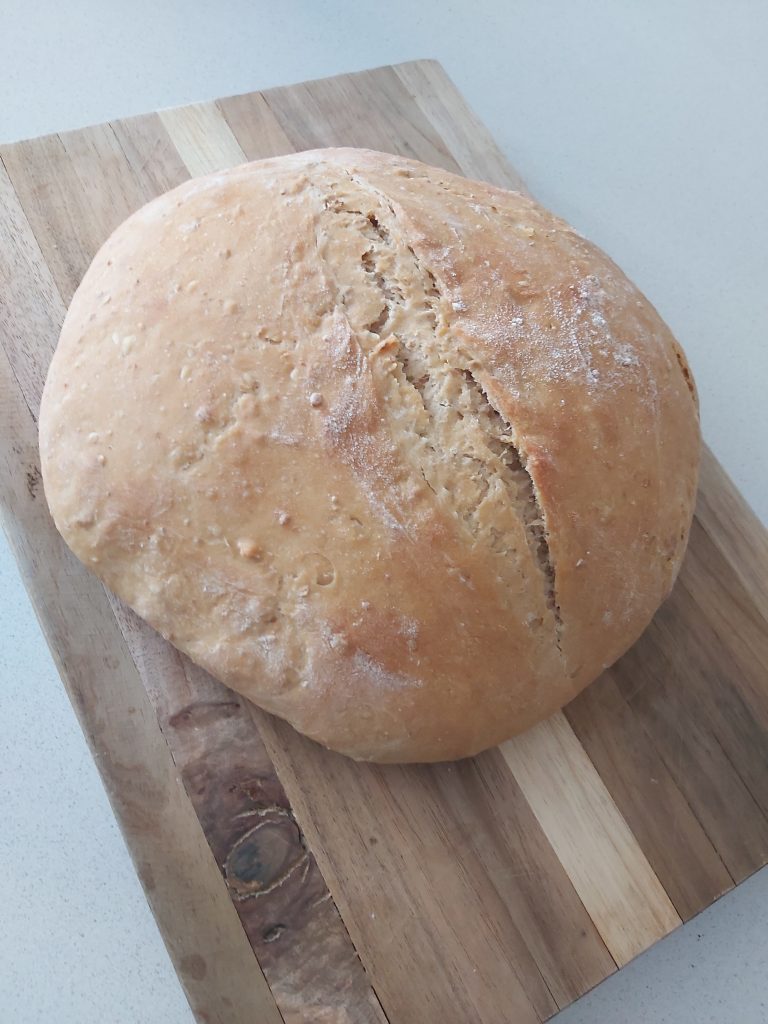
Sour dough bread truly embraces the art of slow food. My method takes 24 hours… and that’s excluding the 7days it takes to make a starter from scratch. You could make it in 12 hours but I find the 24 hour method easier.
I really love the idea of being more self sufficient and learning about ways to do basic things we generally take for granted. Its about appreciation for the simple things in life and lowering your impact on the earth at the same time. What could be more simple than our daily bread? We sourdough might not seem simple but once you have made successful batch you will realize that this is the way bread should be.
The reason Sourdough is so different is that it uses natural yeast and beneficial gut bacteria to make the bread. This bread is therefore more easily digested.
Bread is something I loved making from scratch as a child (using normal shop bought yeast). It was something that just fascinated me and was so rewarding. Sourdough has rekindled that child like fascination on a whole new level.
My starter lives in the fridge now and I used just a little bit to make this bread. I will go through each step and let you know how you can adjust the timing if you want you bread the same day.
Step 1. Take 35g of your starter and add to a glass jar. Add in 70g room temp water and 70g flour. I used half white and half wholewheat. Mix and cover with a cloth or paper towel so no bugs can get in but air can escape. Leave at room temperature. I left mine for 12 hours but you can use it after 5-6 hours.
Step 2. So after 5-12 hours the next step will be to weigh out the flours. You can use a mixture of flours you prefer and you can play around with this but just note that each different flour or combination of flours will res6is a completely different bread both is taste and density.
I used 800g of white stone milled flour and 100g or wholewheat stone milled flour. Made a roughly mixed dough by adding 600g of room temperature water. After you have roughly mixed the dough, (you definitely dont need to knead it at this stage) pur its aside un a bowl covered with a damp tea towel and let it rest for at least 20-30min.
Step 3. Once the dough has rested you can now start incorporating your leaven (this is what you call your sourdough starter that you made in step 1). Spread out your dough in the bowl with your fingers and poke holes in the top of the dough with your fingers making small indentations. Now pour your leaven on top of the dough to start incorporating it. This is where it gets a bit squishy and messy but it’s so much fun. This is where you start folding and kneading the dough till you feel like the leaven has been well incorporated. I now leave the dough in the bowl covered with a damp tea towel overnight. You can leave it for a minimum of 3 hours but I find the dough really develops and rises really well when left for at least 8-10hours. I have left a dough for close on 20 hours but the taste was very sour so the longer you leave it the more the sour the flavor. So really you must experiment and see what tastes best for you.
Step 4. So after about 10hours of resting my dough has risen the full bowl full. This is the step where you add salt or herbs. The reason behind this is that salt will inhibit the effectiveness of your leaven to rise the bread properly.
I sprinkle salt as I knead the dough. I do a pull and fold method, so I don’t knock out all the air. Use floured hands and add more flour as needed to prevent the dough from sticking to your hands. I then form the dough into a ball by tucking the ends underneath and then place it on an oiled baking sheet. I find the oil really prevents the dough from sticking better than a floured surface and gives a lovely crispy base. I cut a slit into the dough, this really helps give space to for the bread to rise when its baking because initially the bread forms a crust before rising further while baking.
I leave the dough to rest on the sheet for 20-30 min while the oven heats up to 180 degrees Celsius and I make some coffee, this gives the dough a chance to rise up a little bit again before baking. You can definitely use a loaf pan if you want to, but doing it on a sheet definitely gives you the classic round loaf shape.
I bake the bread for approximately 45min but I keep an eye on it to see if its got a nice brown crust and check if it’s ready but knocking on the bread to hear if it sounds hollow before removing it from the oven.
I hope you try making this bread and if you have any questions please do leave a comment and I will try my best to answer your questions. Happy bread making!

